 |
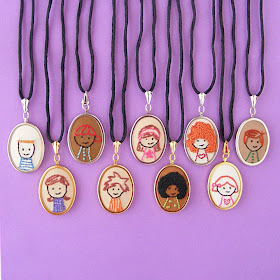
| Kiddie Cameos embroidery pattern |
Yes - YOUR kids. There are 30 different kids to choose from in this pattern - boys and girls with all kinds of different hairstyles. Customize them with your little one's hair color, choose their favorite color for their shirt - and you're good to go.
Boy with a buzz cut? Check.
Girl with high pigtails? Check.
Girl with low pigtails? Check.
Boy with shaggy hair and wild cowlicks? Check.
Girl with a bob? Check.
Boy who never willingly removes his baseball cap? Check.
Curly hair, straight hair, long hair, short hair, neat hair, messy hair - they're all there. Click through to the pattern listing to see all the kids included in the pattern. I hope you find your own kid in this bunch!
These are sized to fit the new oval pendants I've just added to the shop. But, of course, like any embroidery pattern you can enlarge or reduce them to be any size you like. Grandma would probably love a necklace with her grandkids on it - but Grandpa might like a larger framed image he can hang on the wall. :-)
And they're easy! Unless you go crazy with the French knots for a curly-haired kid (which, admittedly, is a really fun thing to do) most of these will stitch up in way less than an hour. On a scale of three thinbles - this pattern's a two.
But back to those pendants. . .
They're really easy to use and have a nice, clean finish. Want to see how they go together?
Step 1
Stitch your image. Right now the only pattern especially designed for these frames are the Kiddie Cameos, but I'll also be adding more patterns to the shop in the coming weeks. On deck are alphabet patterns, flowers, zodiac images, and dingbats. If you have an idea for a theme let me know! I'm happy to consider anything. :-) And, of course, you can enlarge or reduce the size of any image in any pattern to fit any frame. There's a tutorial right here showing you how!
Center your image in the frame.
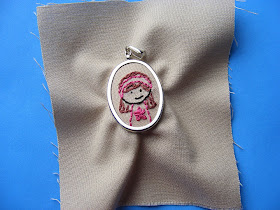 |
| It's already looking pretty fancy. :-) |
Back it with the domed insert, with the curve of the dome pushing the image up, ever so slightly through the frame. This is what it will look like from the back.
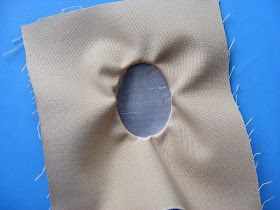 |
| The insert should be dome side down here - like a shallow bowl. |
The domed insert makes a nice little dip in the back - the perfect place to tuck the raw edges of your fabric.
Step 3
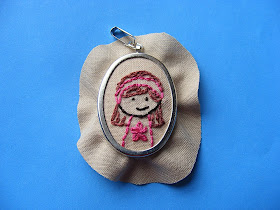 |
| I leave roughly 1/4 to 1/2 inch all the way around. |
Trim away most of the excess fabric. Not too close!
Step 4
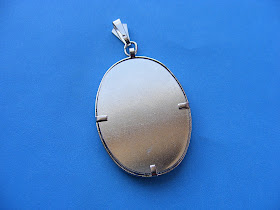 |
| Nice and neat! |
Fold the edges of the fabric into the little well, then cover it up with the flat back piece. Fold the three little tabs over the backing to hold it in place.
Done!
 |
| Isn't she a cutie? This could be your kid! |
Mother's Day is a little more than a month away - plenty of time to stitch some of these up for your favorite moms and grandmas - and for yourself, of course. :-)
Get the Kiddie Cameos embroidery pattern here.
Get the pendant frames here.
And don't forget to share photos of your work! I can't wait to meet all your kids! Email them to me or post them to the Shiny Happy World Facebook wall.
Happy stitching!
Best,
Wendi

Wendi, these are adorable (and much nicer than those car decals I'm seeing everywhere) but you left out eyeglasses, unless I missed them in the patterns!
ReplyDeleteAack! What an oversight! I'll fix it by the end of the week. :-)
DeleteThese are super cute and I can't wait till you do the alphabets, I have been looking for some beautiful ones.
ReplyDeleteLove these!
ReplyDelete